We all can relate when it comes to spending long working hours in the office for obvious reasons that lead to lower back pain, and I have been experiencing severe back pain due to the uncomfortable office chairs. This made me seek comfort and get myself an ideal office chair to get rid of my back pain and work with comfort. However, I started looking for a motorized sit/stand desk but to my surprise it turned out that motorized desks are quite expensive in my region. This made me look for a manual hand crank desk. And I finally found a used Ikea Trotten which was only used for a few months, as I wanted to turn it into a motorized one I didn’t want to try such an experiment on a brand new one which would set me down more than double the price I paid for the used one.
Finally, I ended up buying the used Ikea Trotten hand crank with 120cm X 70cm Desk. Hand crank was pretty smooth but it took around 2-3 mins to make it lower or higher. Next I started looking at the options to turn this hand crank into a motorized version.
I was lucky that one of my ex-colleagues had tried this experiment with success but it was not perfect. He was kind enough to share his experience with me and the mistakes he made so that I don’t make the same mistakes.
These are the points one should follow
- Get the right size of motor depending on the size of the desk and the weight you plan to put on it.
- Get the right size of the hexagon shaft that is used in the desk. There are mostly 2 sizes used, 6mm and 8mm. Mine used 6mm while most of the motors I searched online were 8mm, while some vendors advised me to comment in the message of the order to inform the size I needed.
- Order a long shaft so the motor can be fixed on the edge of the desk instead of it being closed to the shaft hole where the metal frame will interfere with the motor edge.
The most important part of this project was to find the right motor along with its controller and memory based buttons. I had to search for multiple days on aliexpress to find the right one, as most of the motors come in 8mm hexagon hole while my desk used 6mm hexagon, I had to ask multiple supplier if they get source 6mm hole motor or not. I settled on a motor kit which has the best control panel. It has manual up and down buttons and 4 preset buttons.
 Complete Motor Kit


I found the right one but it was quite expensive to be shipped because of the shipper charging too much for the shipping. My cousin helped me source it from China, thanks to him we found the exact same kit with some extra parts which was a gift from my cousin’s chinese agent as it included a plastic case for the motor and wireless remote to operate the motor up and down.
I was made aware by my ex-colleagues about his experience with a shorter shaft which made him cut some part of the metal frame to accommodate the motor edge. To avoid making any changes to the metal frame he advised me to order a longer 6mm shaft around 400mm or 500mm so the motor can be installed on the edge of the desk where the metal frame would not interfere with the motor edge. I did as advised and ordered the 500MM long 6MM shaft
I received the shaft and the motor kit in 10 days so I went straight to fixing it to the desk. To fix it to the desk, I had to make a hole under the desk.
I hooked the motor onto the 6mm shaft and it was in place but I wanted to make sure that it does not bend the shaft with its weight so I used a tiny L shaped Angle to secured the motor in place but it would still move a little while under load, to fix the movement of the motor, I placed a cushion between the motor and the desk, this stopped it from moving and locked it in place with cushion on one side and the metal frame on the other.
Fixing the control panel was very simple while I used a metal under desk storage bracket for the controller box. The cable connection of the motor kit was fairly easy. I had to calibrate the motor as per my desk height, so all I had to do was to move the desk to its lowest height and hole the M key for the motor to start calibrating. It would go to its highest position and return to the lowest and then the calibration is completed. To add the height to the preset buttons, I had to move the height to the desired position and Press M key and the number key. That’s all it took to calibrate the motor.
 Desk with hand crank.


| Product | Price $ | Link |
| Ikea Trotten desk used in pristine condition | $105 | Local |
| Motor Kit with DHL Shipping | $95 | Aliexpress |
| Wire Hole Cover | $1.09 | Aliexpress |
| Custom RGB Mouse Pad 400X800MM, 3MM thick | $25 | Aliexpress |
| Under Desk Storage drawer – 220cm x 155mm – 35mm thick x 2 | $12 | Aliexpress |
| Magnet Cable organizer x 2 | $10.80 | Aliexpress |
| 6MM Hexagon Shaft 500MM Long | $7 | Aliexpress |
| Under desk holder shelf | $19.1 | Aliexpress |
| Headphone Hanger bracket | $1.88 | Aliexpress |
| Black Universal cable organiser clips 20 pcs | $5.51 | Aliexpress |
| Power Strip Holder | $27 | Amazon |
| Total | $309.50 |
After paying all the above, I am very happy with how this project turned out and I got everything I wanted in my stand desk, that too in half of the price of Ikea’s Bekant motorised desk as it does not have the needed cable management.
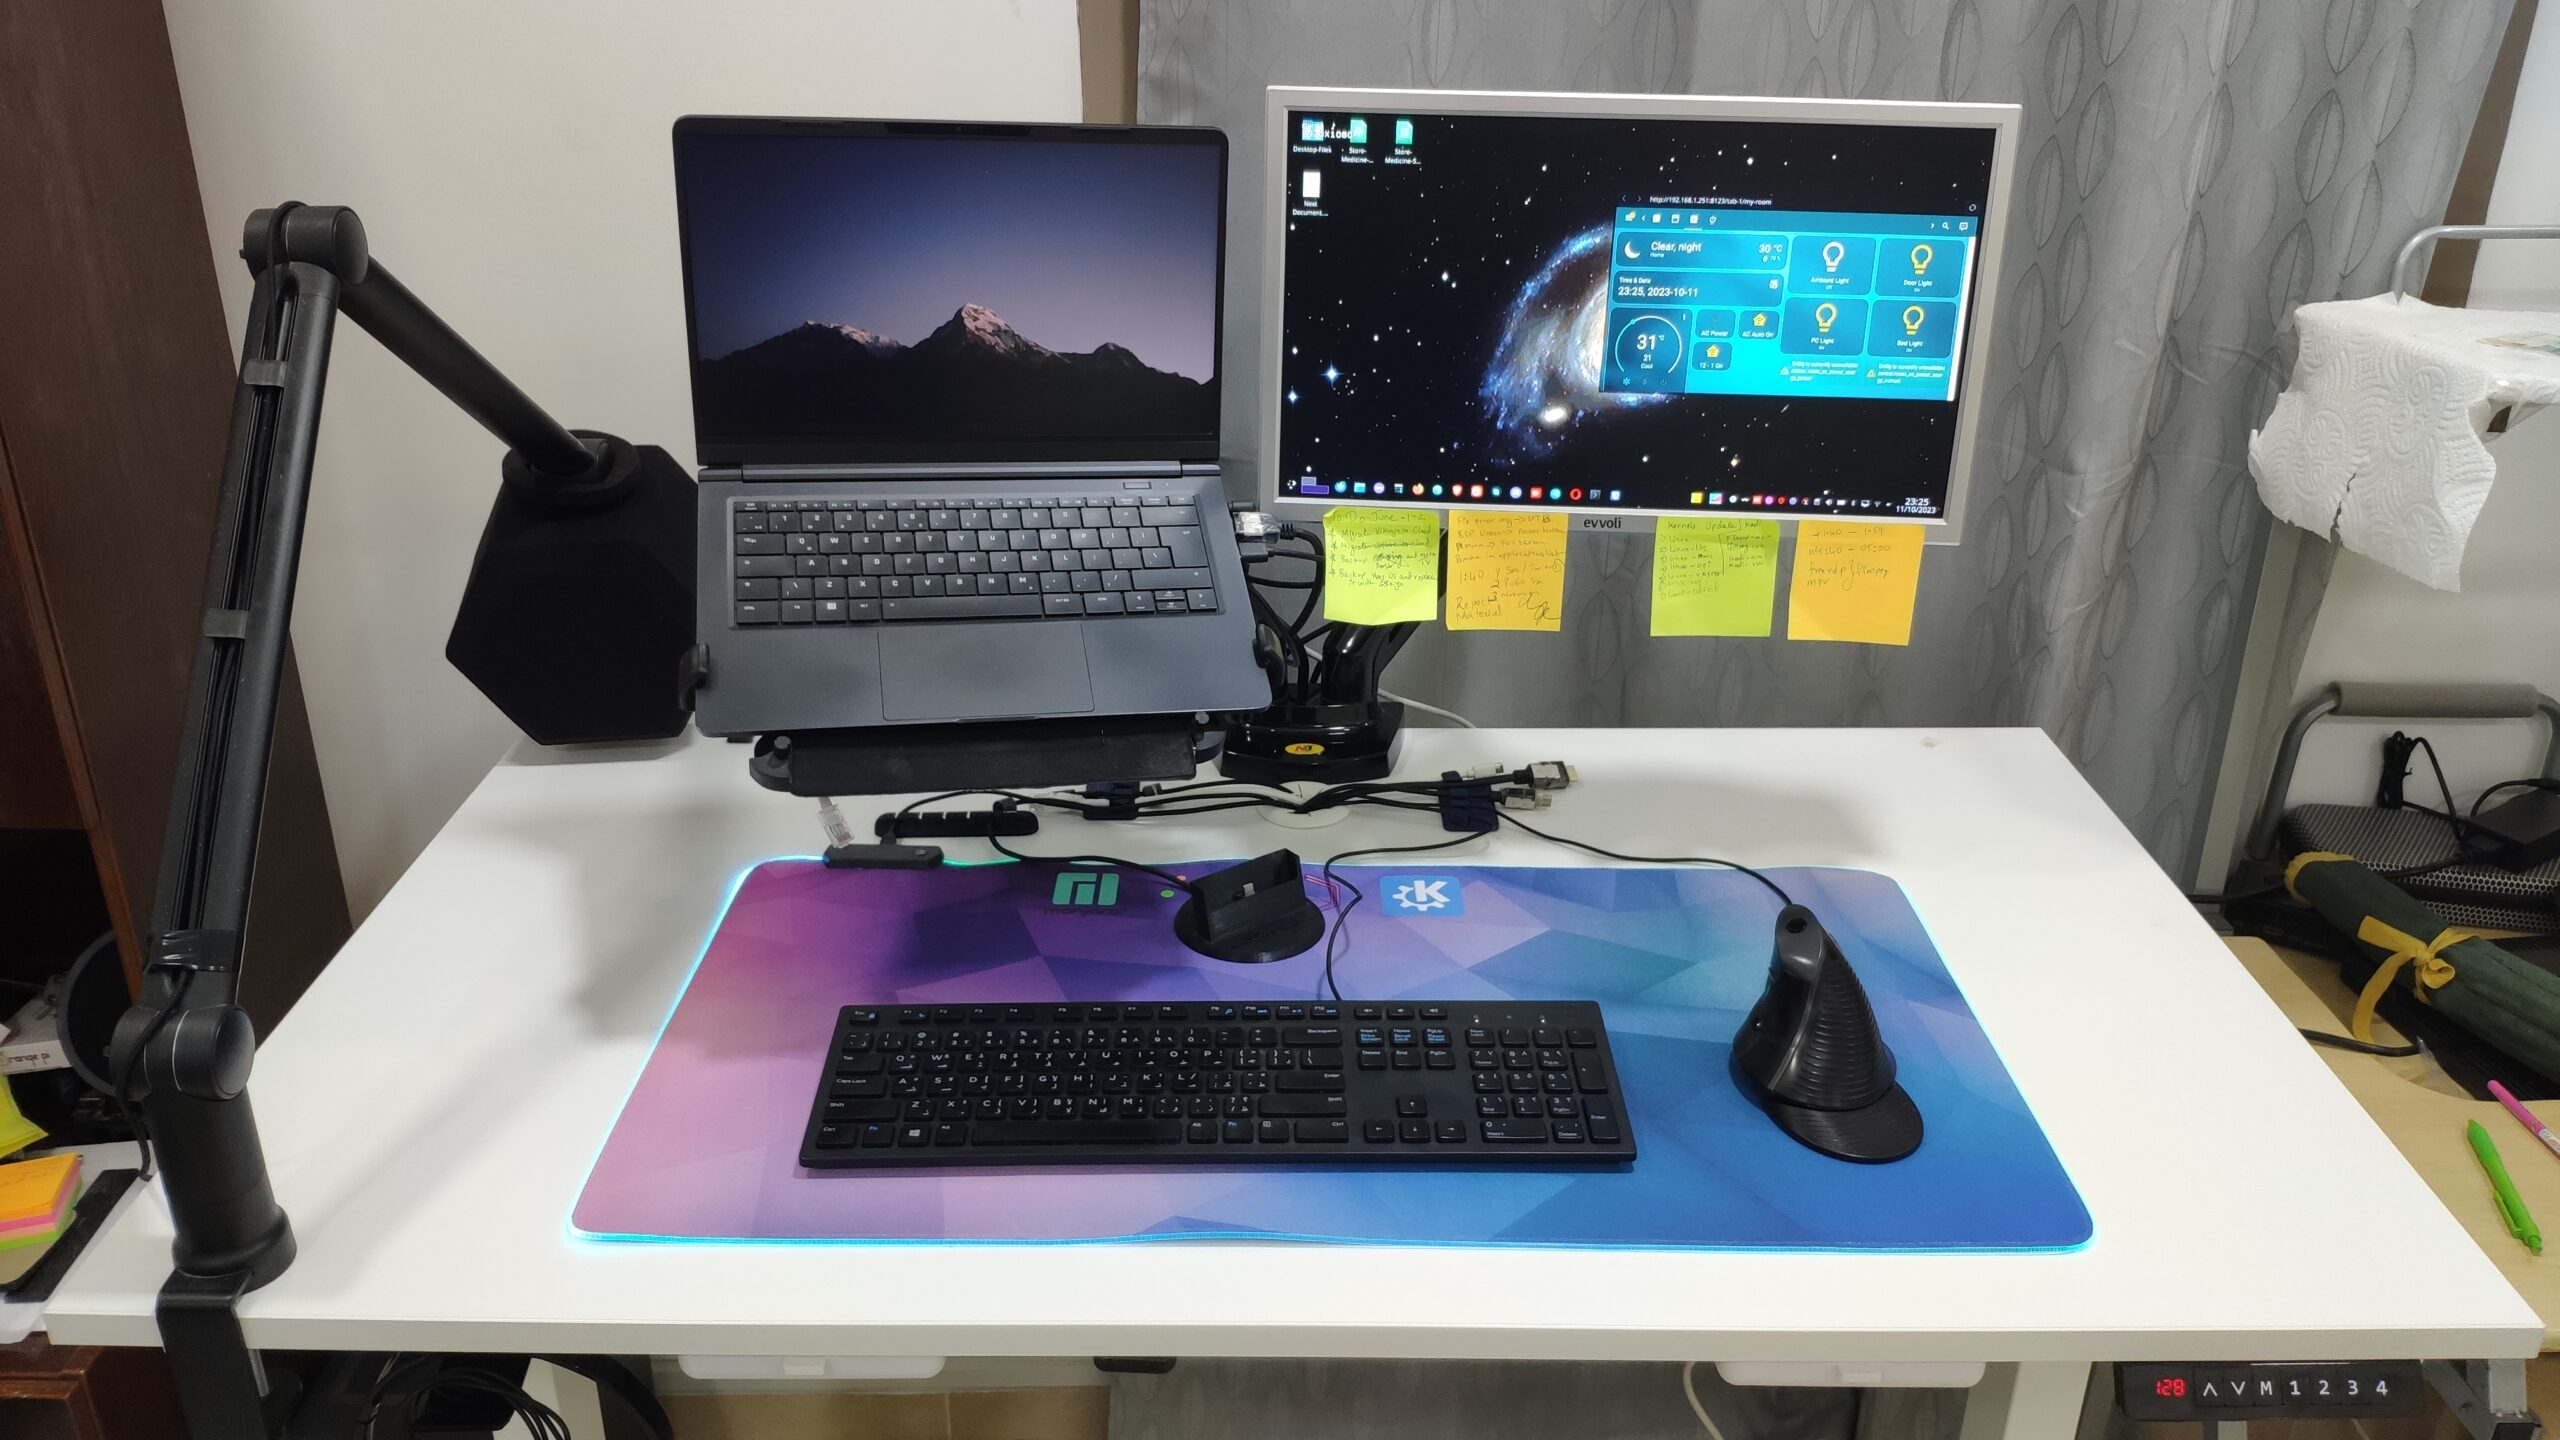
 Front view of the desk with cable organisers and RGB mouse pad.


This desk holds most of my devices which were on the desk are now under the desk.
Under the desk devices.
- Apple Mac Mini M2
- 8 Port 2.5G Lan Switch
- 4 Port KVM Switch
- Power Strip
- Desk Motor Control Panel
- 2 Drawers
- 8 X USB Port Power supply.
- Headphone Holder
On top of the desk
- Mic Boom Arm
- 2 Display hold stand. ( I use 1 laptop and 1 Monitor)
- A Large Mouse Pad with RGB for Keyboard and Mouse.
- 2 Magnetic cable organisers.
I hope this blog will benefit you if you are looking for something similar and want a solution to your back pain. Work with ease, comfort and stay fit.